
Oh we had fun making this cake, my son is nothing short of obsessed with all things shark like. We searched YouTube for tutorials on how to make a 3D shark cake. It wasn't long before we came across CakesByChoppA and his tutorial. He makes it look so easy so I thought sure why not!

The shark obsession started with my son watching children's documentaries particularly anything about sea monsters like the Megalodon and the ginormous Liopleurodon. That all lead to his love for the Great White shark, he loves it's power and speed. It seemed the perfect birthday cake. here's how I made ours....
Serves 8-10
Ingredients
1½ Qty Simple cupcake recipe
1½ Qty Soft Vanilla buttercream recipe (3-4 tbsp of milk)
300g White sugarpaste
300g White and 50g black sugarpaste lightly kneaded together
30g Black sugarpaste
Boiled and cooled water
Petal glue or other similar edible glue
Blue food colouring
1 tbsp Strawberry jam
Equipment
Large sharp knife
Palette knife
Small clean makeup brush
Rolling pin
Cornstarch or icing sugar in a dredger for your surfaces
Pizza cutter or a small sharp knife
Cake board
Method
Bake the sponge in a greased and lined 34x24x4cm tin for 35 minutes in a preheated oven. The sponge is fully cooked when a skewer comes out clean or the centre springs back when lightly pressed. Allow to cool in the tin for 5 minutes. Turn the sponge out onto a cooling rack and allow to cool completely.
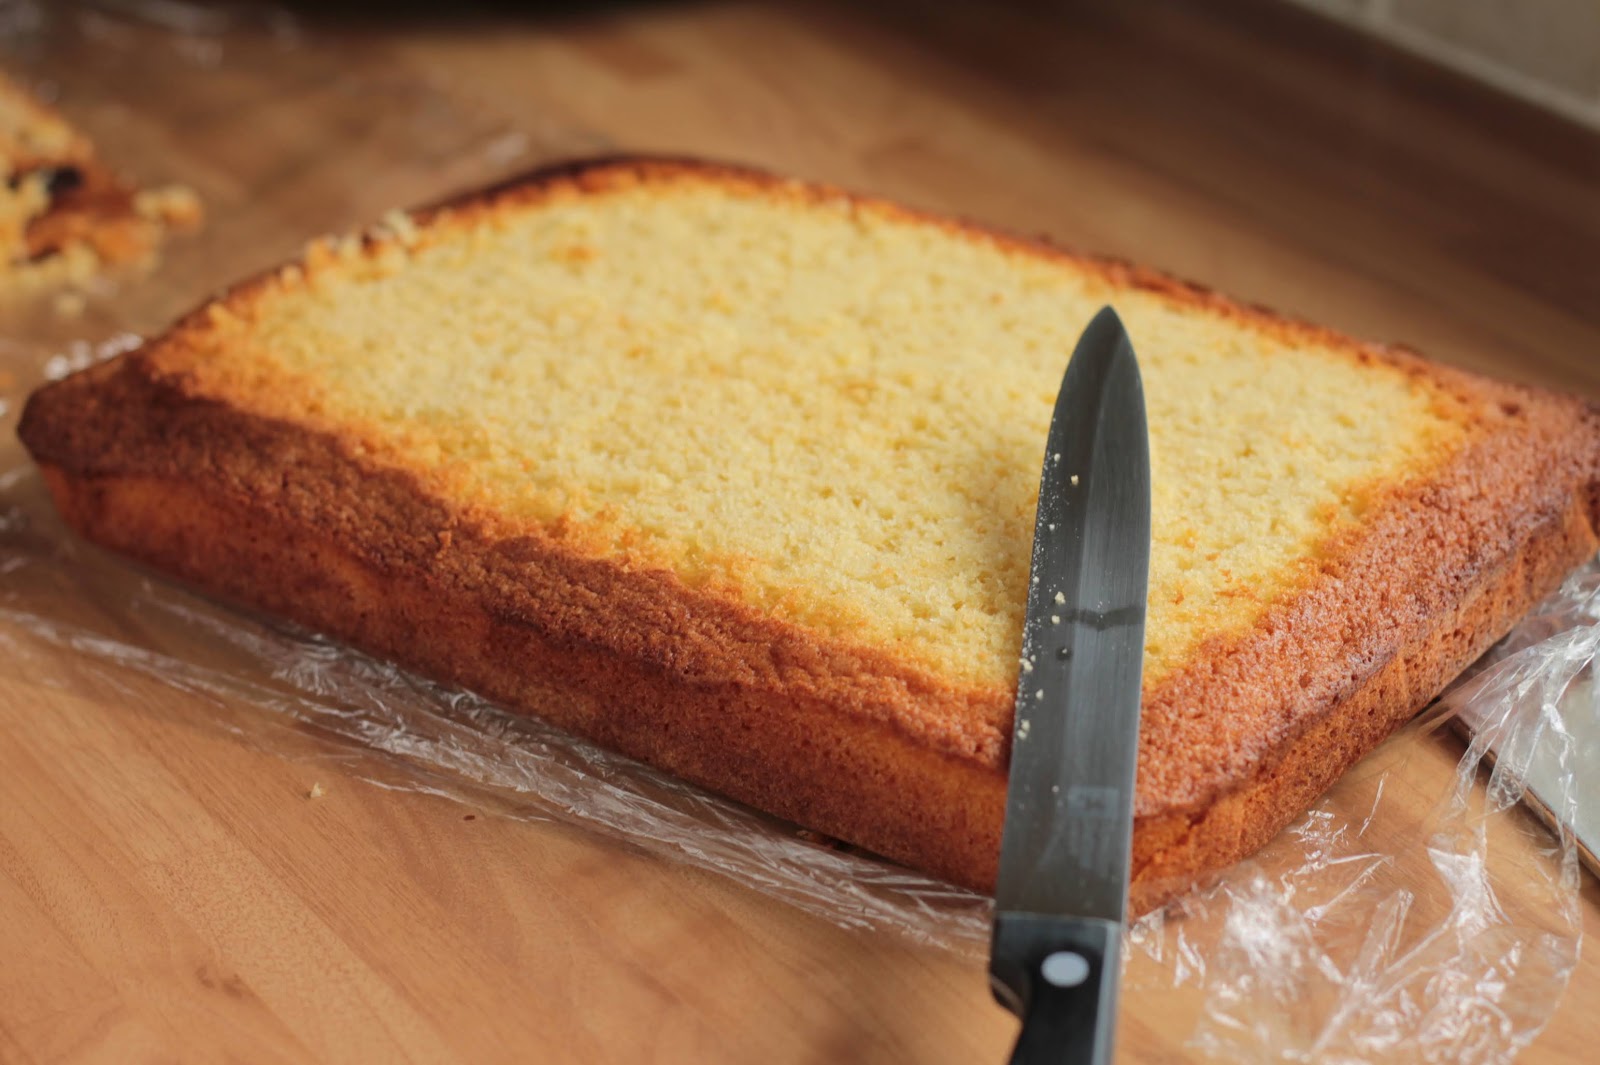
Using a sharp knife, level off the top of the cake, this makes for easier assembling when the cake is leveled.
The above video - from the very talented Cakes By ChoppA - formed the basis for this cake. I highly recommend you watch all 4 minutes and 37 seconds of the tutorial before you attempt to carve your own sponge. I watched it a couple of times before I put a knife to sponge. I used a square cake board which I positioned the cake diagonally to allow room for the dorsal and pectoral fins.

This is how my cake carving turned out, I had some patching to do but overall I was very happy with the finished shape. I graduated the size of the ovals for a more tapered look - starting with bigger oval at the base and finishing with the smallest nearest to the nose - the sponge corners acted as the shaping for the nose. Patch up the cake with cut offs until you are completely happy -which I did plenty of - none of which will be seen once the crumb coat is on.

Set aside about one third of the buttercream for the water at the base of the cake, you can dye that an oceany blue later. The softer the buttercream the easier it will be to coat your sponge - if it is too stiff the buttercream will lift off the sponge and mainly stick to your palette knife, causing great frustration and excessive use of unsuitable language - remember to put buttercream between each layer before starting on the crumb coat. The crumbcoat is another opportunity to shape your shark and fill in all those cracks. I wasn't entirely happy with the nose of the shark so I added a small triangle to the tip for a more pointed look.

My finished crumbcoat with markings for the eyes. My own buttercream was too stiff at the start - use of unsuitable language ensued - so I added that fourth tablespoon of milk for a softer and more cooperative buttercream, all went much better after that. Chill the cake in the fridge for 10 minutes.

Dredge your surfaces with cornflour or icing sugar -I prefer cornflour because I require less and it doesn't stick as easily - and roll out the 300g white sugarpaste. Roll out to about a thickness of 4mm, using your pizza cutter or a very sharp knife cut out a dome shape for the belly of the shark.Use your rolling pin to lift the sugarpaste onto the cake.

Gently lay the sugarpaste into position, smoothing it into place with the heel of your hand. Smooth it with a ball of leftover sugarpaste. Keep the cut offs for the teeth.

Take the remaining 300g of white sugarpaste and dot it with the 50g of the black, knead it until it has a marbled finish. dredge your surface with cornflour/icing sugar and roll out the sugarpaste to 4mm thickness. Cut out a dome shape for the top of the shark, roughly tear the edges.

Once again use your rolling pin to lift the grey sugarpaste into position, stick it into position using the boiled and cooled water and a small makeup brush.

Smooth the seam with your fingers, gather up your grey cut offs and roll them until they are about 6mm thick.

Cut out 3 fin shapes and position them, keeping them in place with the boiled and cooled water.

The gills are very easy to make, use a sharp knife to cut 3 gills (or more anatomically correctly 5 gills) into the side of the shark just above the pectoral fin.

Once you are happy with your fins and gills, take 10g of the remaining black sugarpaste and divide it into two, roll each into small balls, flatten slightly and glue into place with the boiled and cooled water.

Dredge your surfaces again and roll out the remaining black sugarpaste (2mm thick) into a small dome shape to line the mouth, glue in it into place with boiled and cooled water and score it like the roof of it's mouth. Roll the remaining white sugarpaste into to a long sausage and cut into 1cm(ish) pieces, shape each into a tooth (cone) shape. Using the edible glue (I use PME Petal Glue €3.45) and position each tooth, hold in place for a couple of seconds. Place each tooth until you are happy with it the finished result. Allow to dry completely.

We warmed some strawberry jam and dabbed it around the teeth for a bloody look and a small white dot for the eyes. I had some PME Ocean Blue food gel leftover from our Disney Merida Birthday Cake Tutorial and used it to colour the leftover buttercream, which I swirled around the base of the shark.That's it all done.

Use your index finger and thumb to pinch the edges of the fin and soften the look of the fin, it gives a more realistic look.

